Sara Golden Jewelry

In the Studio

My 2024 Mantra

On a Personal Note, In the StudioSara GoldenComment

I have fully embraced annual mantras, finding them so much less guilt-inducing than resolutions. Last year’s is still a favorite—“Have More Fun”—and felt relevant after the difficult November and December I’d just had. Those words helped me have an overall better 2023.

And even though I’m more practiced at taking spontaneous breaks for shenanigans, the thing I just can’t quit doing is over-scheduling my days. I give myself too many things to accomplish, treating my to-do list like a pie-in-the-sky wishlist instead of achievable task list. I beat myself up if I don’t finish everything; when hiccups or unexpected delays come up I get huffy and bent out of shape. It’s not pretty.

In reflecting on this past year my new mantra for 2024 became obvious: Do Less. I need to cram less into my calendar in order to give myself the time and flexibility to concentrate on the good things.

My 2023 Mantra

On a Personal Note, In the StudioSara GoldenComment
Ridgeline Drop Earrings in crystal

I’ve come to really love picking a mantra for the New Year instead of setting resolutions. Resolutions are easily forgotten within a month or two, only to be replaced with guilt for having neglected them so soon. A mantra feels more like a nudge, a gentle reminder that hey, here’s a thing that’s important to you — is there something you can do in this moment, even if it’s tiny, that’ll help you get closer to it?

And after taking a look back at all of 2022, especially the last few months (they tend to be craziest for retailers/people selling their wares), it quickly became clear what my mantra for 2023 should be:

Have more fun.

Overly simplistic-sounding and hugely vague? Yes, but it’s kind of perfect for me.

I have to admit that I stole this phrase from my husband, Zach. When he originally said those words, they instantly resonated deep down in my soul. Like, faster-than-the-speed-of-light instantly. And the phrase works on so many levels, both in my life and in my business.

Some context: At the end of the year, particularly November and December, I put waaaaaay too much on my schedule, treating it more like a wish list that I felt guilt about not finishing vs. an achievable hit-list. If I fell behind even a little bit I’d get cranky, and I started filling my personal free time with “just one more business thing, I swear!,” and then I’d be boring and tense and snippy. But when I made time for the most important things (like being in my studio or helping out around the house because we’re doing renovations) and “neglected” the things that I thought were important but maybe weren’t, actually (I’m looking at you, all of social media), my mental balance was better. Because I wasn’t as time crunched, I could dive more enthusiastically into the things I chose to do and I was just more fun to be around.

So “Have more fun” is my reminder for the year that I suck when I’m stressed, I’m tired of being stressed all the time, and I need to add more fun things into my life so that I can feel more enjoyment and less angst. In my business I have the most fun when I’m making things and coming up with new designs, not wasting hours creating #content or hunting for the exact right tablecloth that will “immediately convey my brand values.” The time I save by not doing things means more time doing actually fun/productive things, like exploring the creative process more (and leads to some of my favorite pieces, like the Thea Necklace and the Asp Hoops). And in my life, fun is putting more activities on my calendar that I will not reschedule in order to get that Instagram post up, and dabbling in new hobbies (helloooooo, embroidery!).

I’m ready for you, 2023 — let’s do this.

Working It Out

In the Studio, On a Personal NoteSara GoldenComment
Early sketches

My earliest sketches for the “Royal Mines” collection.

Something I’m finally coming to terms with is how long it takes me to put together an entire collection and get it out into the world. Let me explain…

Though I started learning how to make jewelry back in college, I didn’t really dive into jewelry-making until years later, designing for big companies in New York City like J. Crew, Kate Spade, and C. Wonder. When I finally started making jewelry for myself I was still in a “big company” mentality: take a theme and design your brains out; sketch every possible iteration in the form of necklaces, earrings, rings, and bracelets; send the designs to a factory abroad to make; pick through those samples and decide what’s good to go, what needs revisions, and what gets dropped. We’d sketch anywhere from 150-300 styles per season and land on 80-100 that would go into stores.

When I started making things for myself, it became clear pretty quickly that the way I was used to working just couldn’t be scaled down to a 1-person team. (Correction: it was instantly clear to my husband, Zach; it took me 5 years to get on board). I *loved* designing all those different pieces, bringing a concept fully to life through a wide range of styles. But when you’re the only one sketching, working out the details, sourcing the materials, fabricating every idea, making the pieces to sell, setting the stones, aaaaaand juggling all the business-y stuff, things get overwhelming fast.

But since accepting that I can’t do all the things, I’ve come to some beautiful realizations that wouldn’t be possible otherwise: I can focus on fewer, more special things; I can take the time to get the details right; I can splurge on special or unique stones; and, in this increasingly digital world, I end up with a physical object that I’m proud to have made with my own two hands. Extra points if that object brings joy to someone else, too.

Help from friends

Working out ring details early in the design process with the help of my friend’s cat, Blue.

Ring development

Early versions of the Pharos Ring.

Knowing that there are only so many hours in my week, I’m forced to edit down all the ideas to only those that I’m the most excited about. (“What a burden!” she cried sarcastically.) When you have to fill dozens or even hundreds of stores with new jewelry every few months, it becomes more about quantity than quality. How could anything feel special when you’re churning through hundreds of designs every few months at big companies? Now, I get to tweak and edit something until it’s the best version of itself.

Plus, the jewelry in every store would need to look exactly the same, which meant we’d have to use lots of synthetic materials, devoid of the things that make natural stones so unique and interesting. Forget about finding a stone that you like and making just one of something, too; at bigger stores, you’re making 100 at a time or you’re not making it at all.

And I love, love, love that at the end of the day (or rather, few months or even a year) I can hold something in my hands that I made from start to finish. So much labor, creative brainstorming, material sourcing, trial and error, and even frustration go into making each piece, and it’s so rewarding to be able to say I did it all myself.

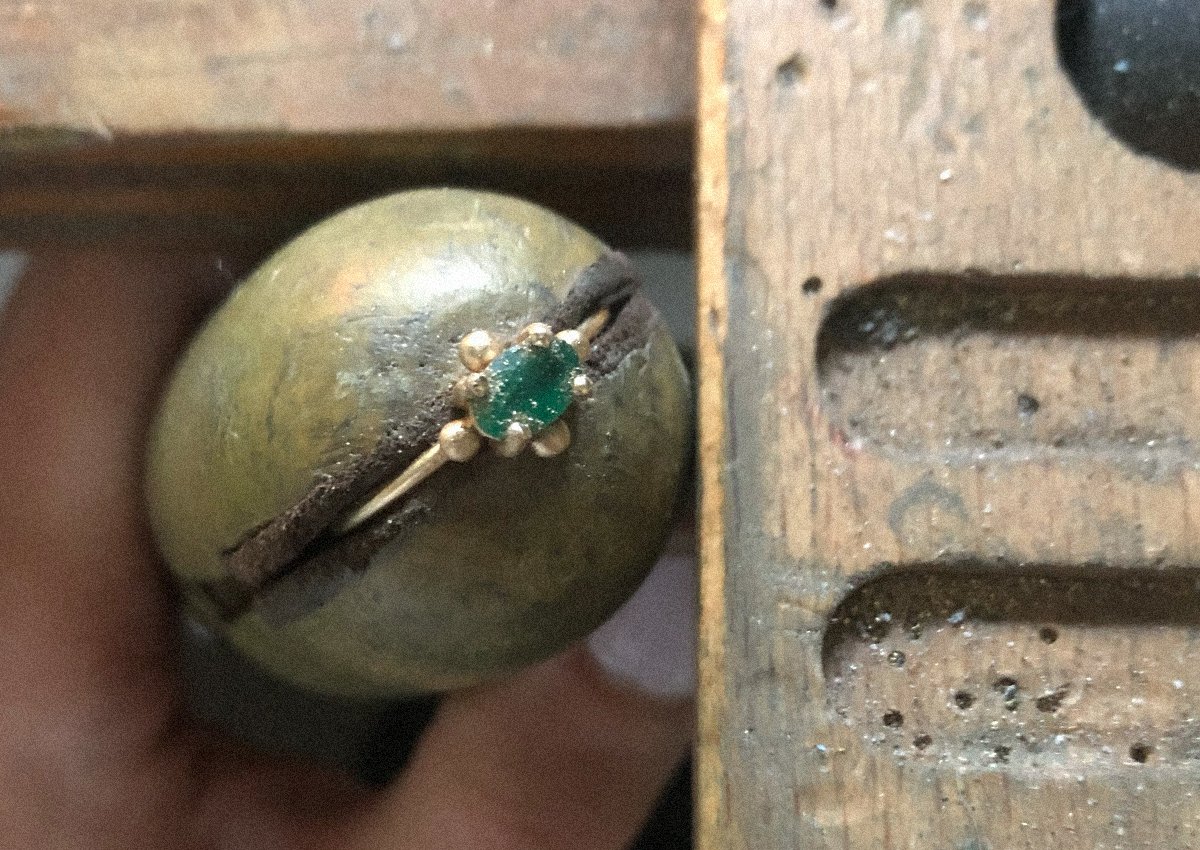
At my bench setting the emerald and getting those prongs looking 💯

This was certainly not meant to be a diatribe against jewelry companies that outsource their jewelry-making to companies overseas — it’s just me realizing after way too long that I’m *not* a 200 person company, and that there are really special things that can happen when you embrace that. And if you appreciate all those same things, I’m so glad we found each other.

A Sustainability Check-In

In the Studio, CultureSara GoldenComment
"Eco Jewelry Handbook" by Christine Dhein

With the world coming alive again and Earth Day coming up on the 22nd, I’ve been thinking a lot about the environment and my role in it. I wanted to look more closely at my and my jewelry company’s environmental impact and realized that I could be doing a lot more than I currently am (and also, what have I been waiting for?)

I’d already been casting jewelry with recycled brass and silver as well as fairmined gold (fairmined is more about how we treat the people that mine the gold vs. its environmental impact, which still feels important). I’d also been using recycled paper whenever possible, including recyclable mailers and crinkle package filler made of mostly recycled papers.

…But that’s it. Embarrassing, right?

So I did some digging and asking around, picked up Christine Dhein’s “Eco Jewelry Handbook,” and started making some changes:

  • Jewelry-making requires lots of chemicals and potions — I’ve begun replacing them with more earth-friendly alternatives that are easier to neutralize and dispose of. This is especially important to me considering I live in the Catskill Watershed, an area whose water feeds the reservoirs that then feed NYC and the surrounding areas; we have to be extra careful about what goes down our drains, into the soil, and into the water.

  • Using EcoEnclose for as much of my packaging as possible, which includes fully recyclable postage stickers and mailers. Soon that will include packing tape and printed materials, too.

And in the next few months I’ll start:

  • Planting a tree for every order placed with One Tree Planted starting this month. This organization has already planted over 40 million trees, working with partners all over the world including the U.S. Forest Service here in the US.

  • Switching to bio-degradable zip bags — every piece of jewelry gets stored in its own bag, so many jewelers (like me) are drowning in them. Not knowing any better, I bought the regular ones in bulk a while ago but once I’m through my current stash I’m making the switch.

  • Reducing the paper stuff that’s included in each order, like skipping envelopes and printed invoices (but keeping gift receipts).

Have you seen other companies doing awesome things for the environment that you think I should consider, too? I’ll readily admit that I’ve got a lot of room for growth, so if you’ve seen something please do share!

How It’s Made: Wax Carving a Ring

In the StudioSara GoldenComment

I’d love to be one of those people with an immaculately clean, magazine-worthy studio, but I’m finally coming to grips with the fact that I’m just not. I don’t *want* to be this way, I promise.

Case in point: my current workbench, which you can see at the top of this post.

The reason for my current mess is that I’ve been trying hard to avoid distraction, get my butt in my studio chair more, and work on new pieces. That involves a lot of wax carving (very messy but very fun), a technique where I carve exactly the piece I want using a block of wax and files, make a mold of the wax, then cast in metal.

I just finished carving a ring I've been dreaming of for a while, a chunky brass ring with a beautiful, deep blue lapis lazuli, and wanted to share the process of making that first wax model with you:

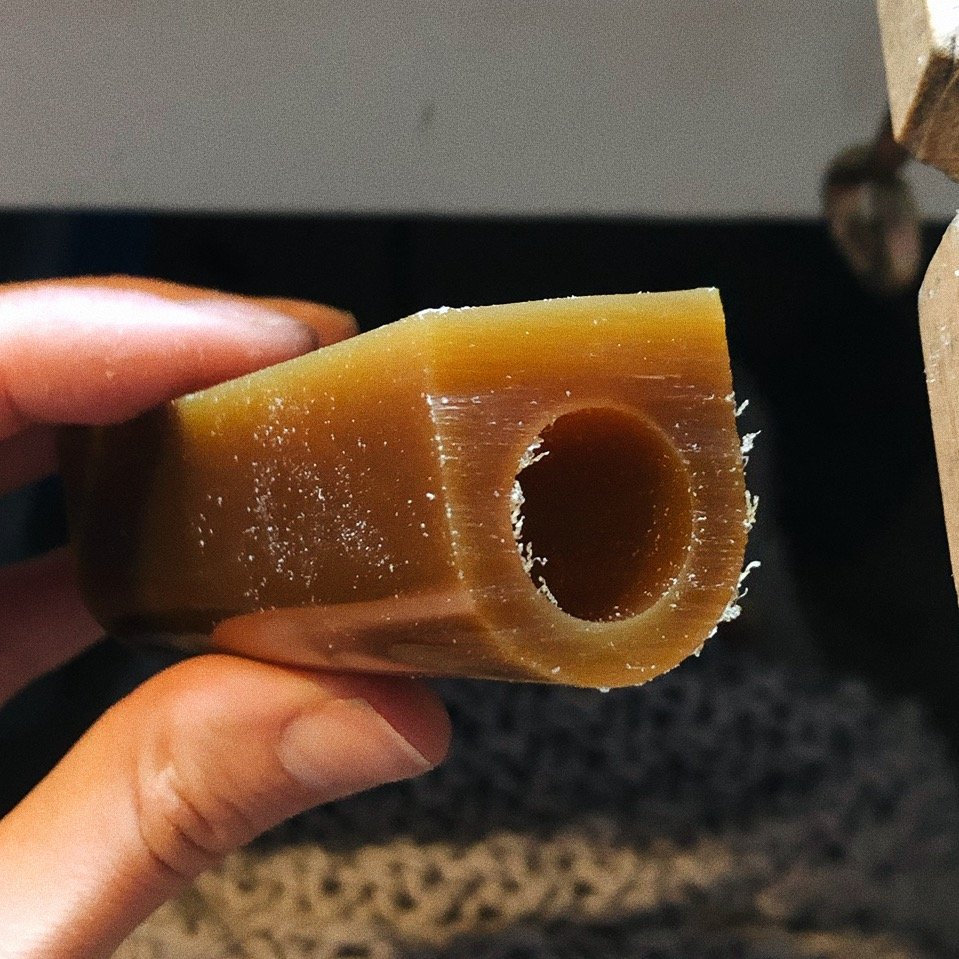
Wax tube

A wax tube specially made for carving rings.

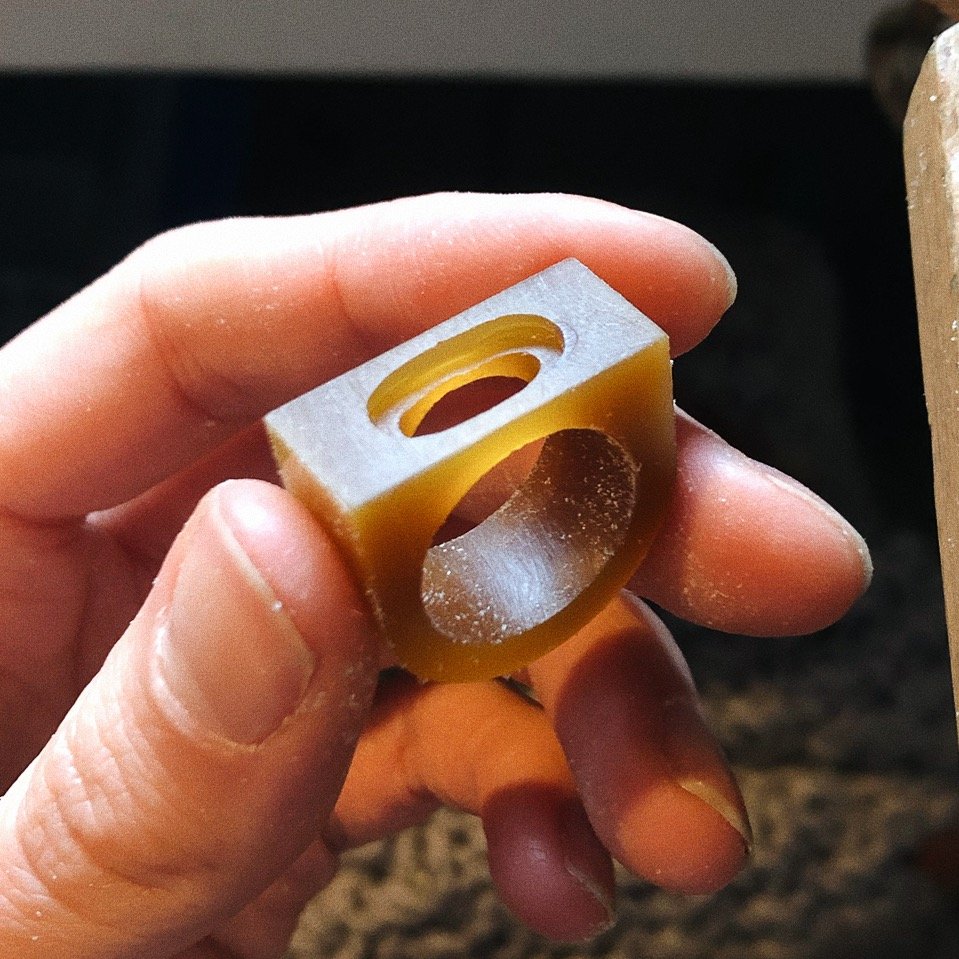
Wax carved shape

The roughly carved shape with a space for the stone.

This ring started as a long wax tube with a hole running through the center. I cut off a section exactly the size I needed, and carved the center hole bigger to fit a finger. I had a true-to-size sketch with exact measurements already figured out, so I carved away more wax from the outside based on those numbers (I hate math, this is not my favorite part) until the whole thing was a rough, geometric version of the ring I had in mind.

Next I traced the oval stone on the flat top of the wax, and dug that shape out to give the stone a place to sit. I carved a smaller oval straight through the top of the ring — you won’t see it when the stone is in place, but it will help the ring feel less heavy and clunky when you’re wearing it.

Wax carved ring coming along

Look! It’s actually a ring now!

Adding wax beads

Making wax beads that’ll get attached to the ring.

Next I carved the contours of the ring, leaving a border around where the stone will go. It’s a slow process — carve, carve, check how it’s looking, repeat 30 more times — but this is when it *really* starts looking like a ring.

Happy with the shape, I moved onto making tiny wax beads. I cut up small bits of wax wire and used a heat pen to ball them up into little spheres. I made little divots along the edge of the ring where they’d eventually go, and attached them with more heat, melting their surfaces together.

Wax carved ring model

Ta-da! The finished ring model.

Silver ring model and original wax

A cast silver model vs. a wax model.

Lastly I cut more wire to make prongs that will hold the stone in place, and used the heat pen to attach them to the top. I checked to make sure the stone would still fit, and voila! She’s ready for casting. Here’s a photo of the finished wax next to an earlier version I already had cast so you can see the before and after.

The whole process took about 3 1/2 hours, and it’s so worth it to get that slightly irregular, hand-wrought feeling that I love in jewelry. Now she’s off to be cast in silver, made into a mold, and then (if I’m happy with how she’s looking) cast for real in brass and set with the lapis.

I’m working out more pieces this same way, and can’t wait to share the final results with you!